After replacing the entire roof of the stables, our next step in the renovation project was to replace the cladding.
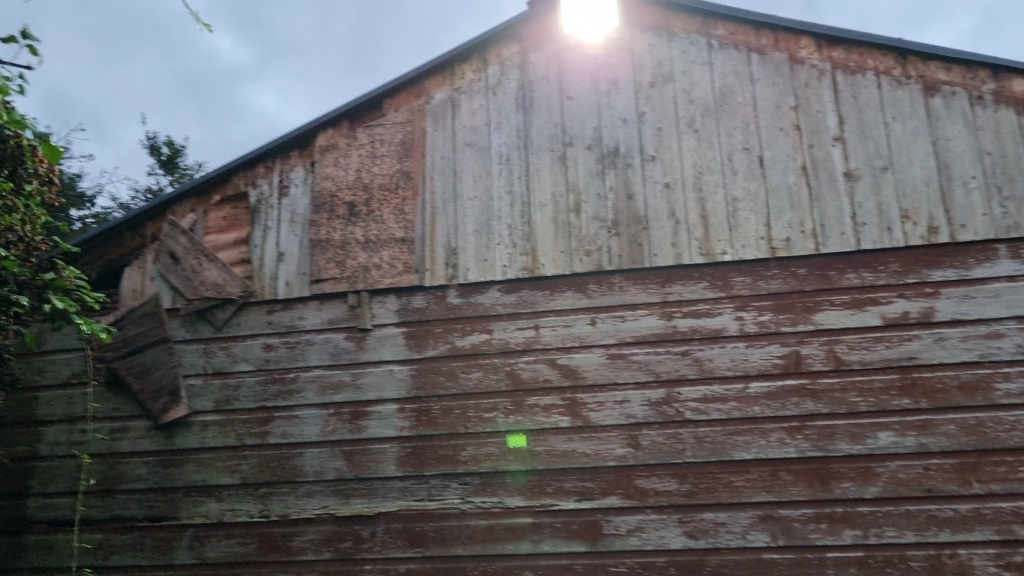
After inspecting the front of the building, we decided that we wouldn’t need to replace the cladding there as the overhanging roof had protected it from, the rain, so there was only minimal damage that could be fixed with wood filler. We decided to start with the left-hand side of the building as that had some of the worst damage and was the most visible.
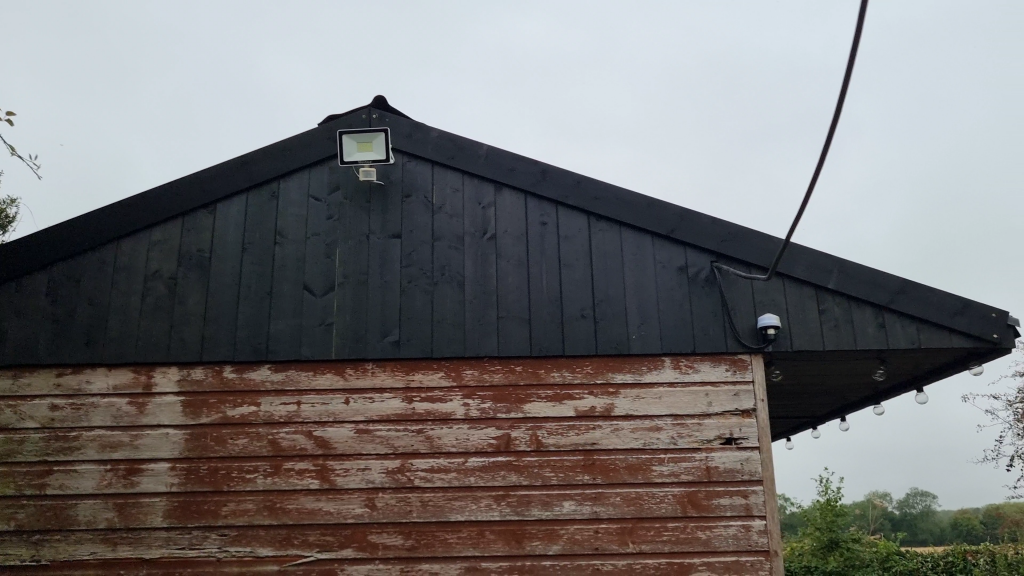
We replaced the cladding on this end on 2 parts, first off, in October 2023 we replaced the tongue and groove cladding at the top of the wall. At the same time, we decided that we would repaint the stables black, rather than the current brown, so before we started with the cladding, we first painted the bottom of the overhanging roof at the front of the stables.
You can see the entire process of replacing the cladding in the video below.
The first step was to remove all of the old cladding. I had hoped that I would be able to use that as a template to be able cut the replacement wood to size, but unfortunately, it was too rotten. I therefore had to measure each piece to make sure that it was the right length and had the right angle at the top.
After cutting the cladding, I then painted each piece before fitting it.
The measuring and cutting was the hardest part, actually attaching the new cladding was very quick using a Ryobi One+ cordless nail gun.
At the same time that I was working on the cladding, my wife was also painting the front of the stables with a first coat of the black paint.
Even with the shiplap cladding below still to be done, the new black look is a big improvement on what it was previously.
In the next post, I will discuss the third stage of the renovation, replacing the shiplap cladding on this end of the building.
2 comments